If you are ever trying to drive LEDs in your circuit, you always do it with a constant current driver. You don’t use a constant voltage drive with maybe a resistor to regulate current because not all LEDs are made equal, even in the same batch. The forward voltages of LEDs do change, when that changes, the effective brightness will also change, when you drive it in a constant voltage mode. So whenever you are driving multiple LEDs or want to maintain a constant brightness always use constant current drivers.
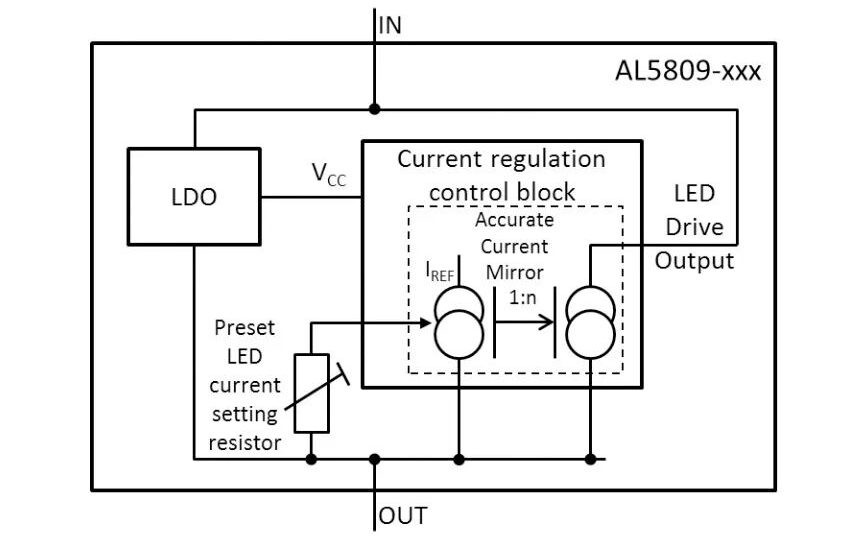
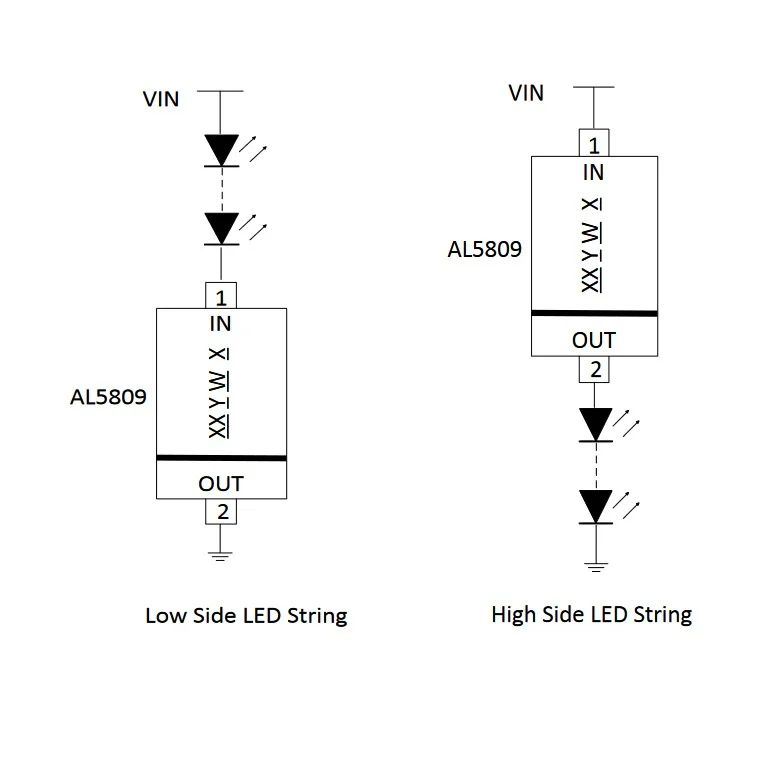
Recently ran across AL5809 which is an ultra simple 2-pin constant current driver IC which will fit the package dimensions of small SMD resistors. These come in various options of current regulation from 15mA-150mA. The nice part about this is that you can string multiple of these in parallel and can get even more current in a single channel. So you can use them in a wide variety of LED use cases. Internally it contains a fixed resistor with a current mirror which gets changed in each version of the IC. You need to provide a voltage of at least 2.5V across these terminals more than the series voltage drops of your LEDs. So think of it as adding one LED in series to your LED string to regulate the current.
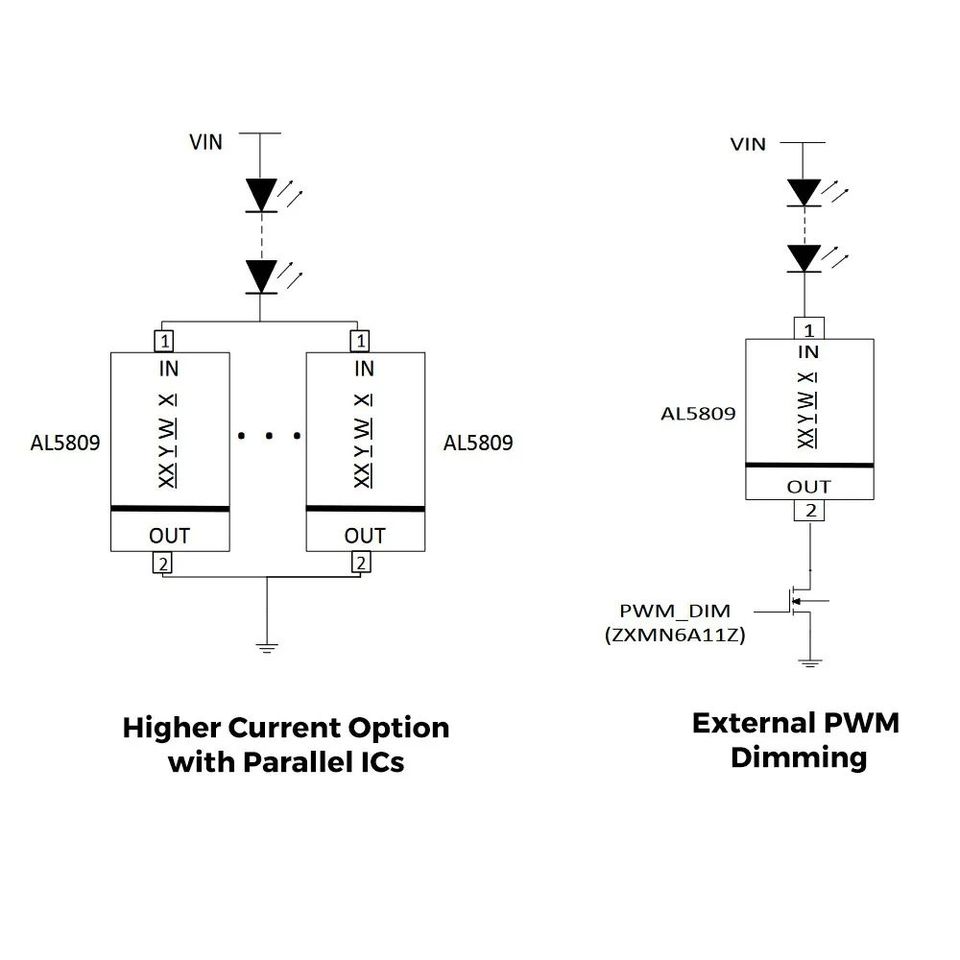
It does support PWM dimming also with an external MOSFET to dim the brightness from 5% to 95% at a frequency of 100Hz. This is kinda low because if used in photos/video applications, you will see flickering of the LEDs. I do think it can be driven at higher rates but the regulation might not be linear anymore. One major thing to consider for these ICs, is their power dissipation, Whatever the extra voltage is in the rail after adding up the forward voltages of LEDs, should be dissipated in these ICs. So if you have a 24V line and only 2 LEDs with 3V drop each would mean 18V is dropped across this IC. If it’s rated for 150mA, Power dissipation will be 18V*0.15mA = 2.7W which exceeds the package’s thermal capabilities unless you cool it externally.
Anyways nifty little chip, worthwhile considering because of its simplicity, accuracy, price and size in your next LED project.