Powerstrip Teardown

Powerstrip Teardown
Powerstrip Teardown
Powerstrip Teardown

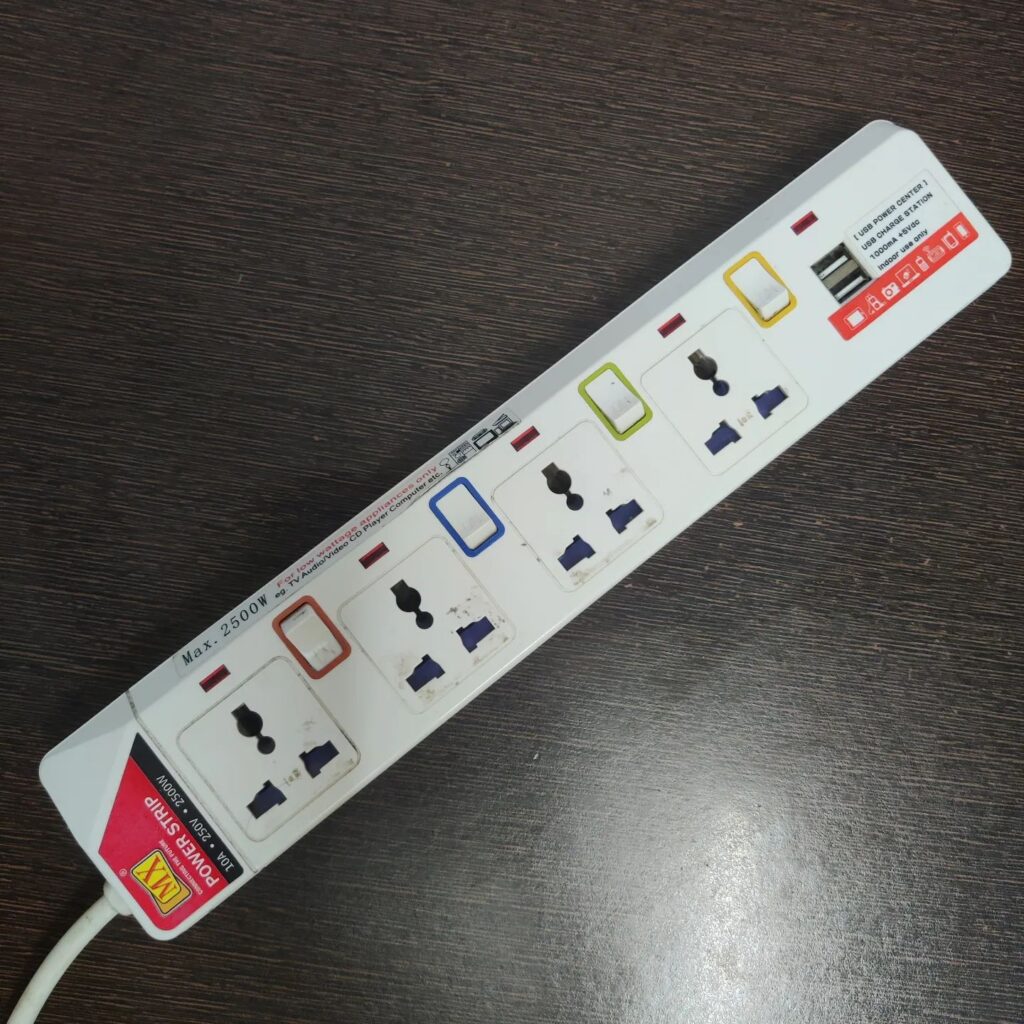
I have been using this 10A(2.5KW) MX brand powerstrip for the last few years now. It’s decently built and has individual port control for switches. These ones come with a 5V USB charger port which delivers up to 1A of current. Since they are relatively cheap, wanted to check out the mechanism of the 220V to 5V generation part. I was expecting some very cheap.
Powerstrip Teardown
Powerstrip Teardown

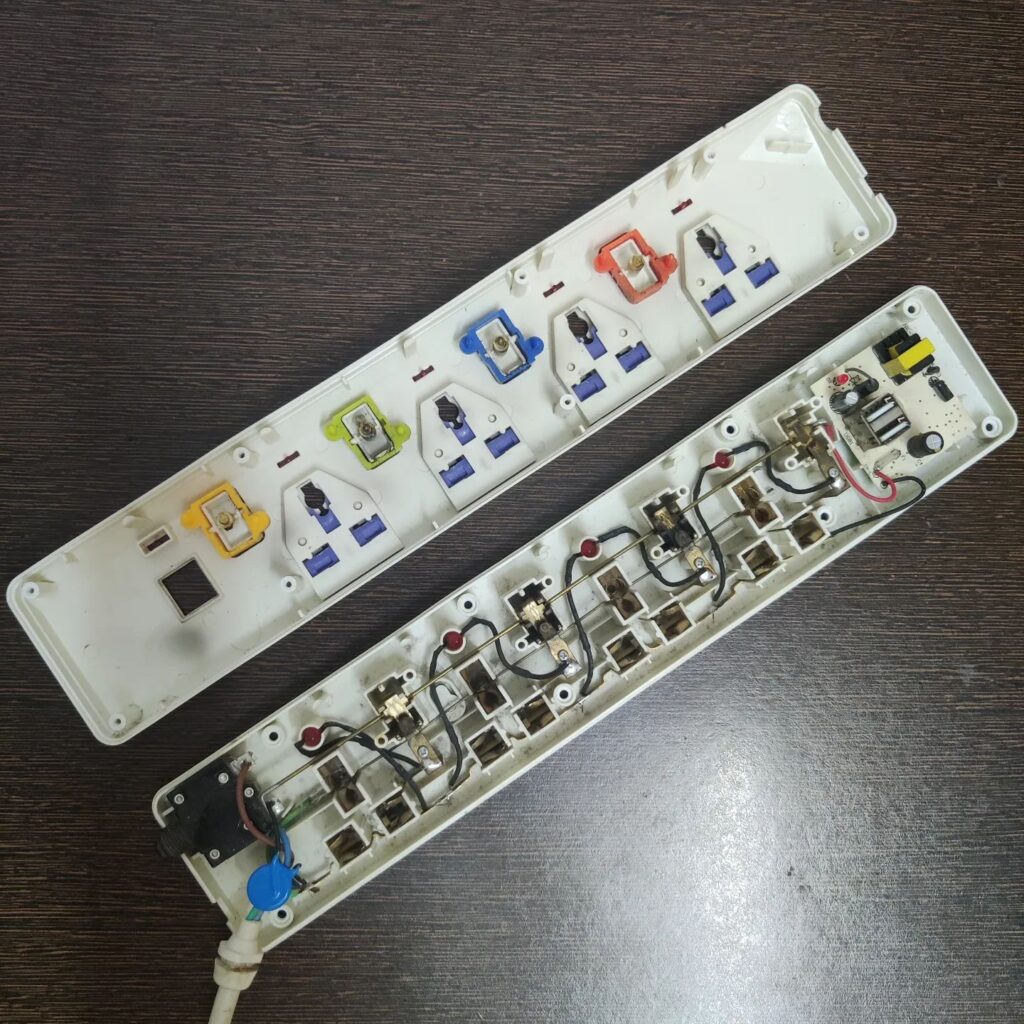
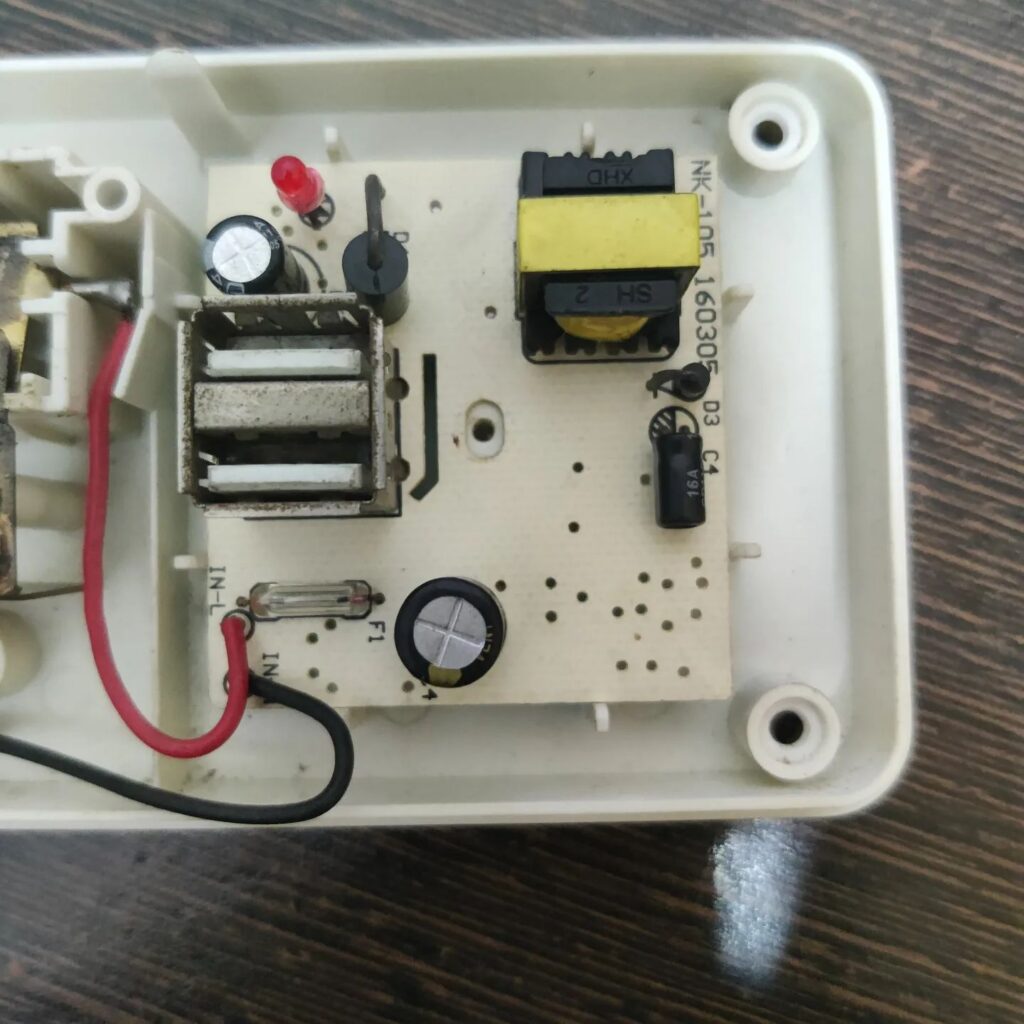
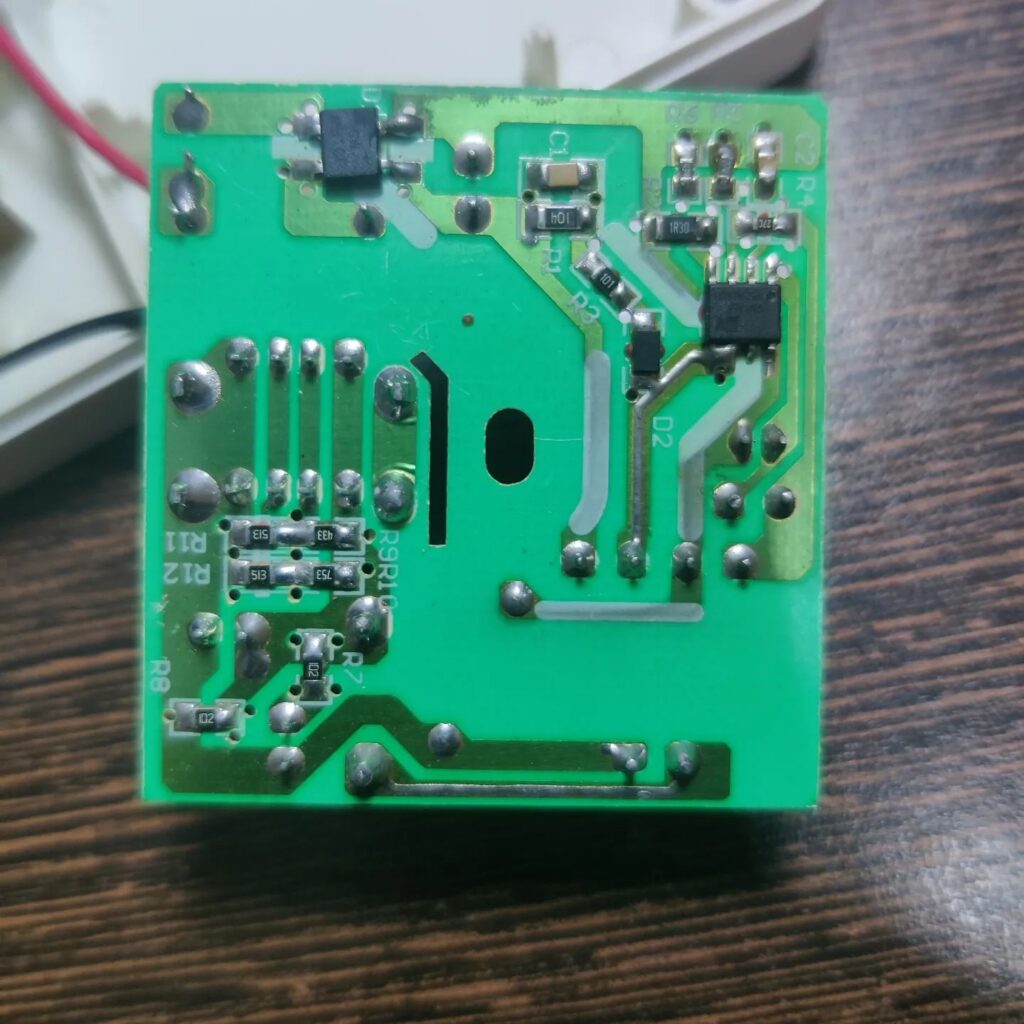
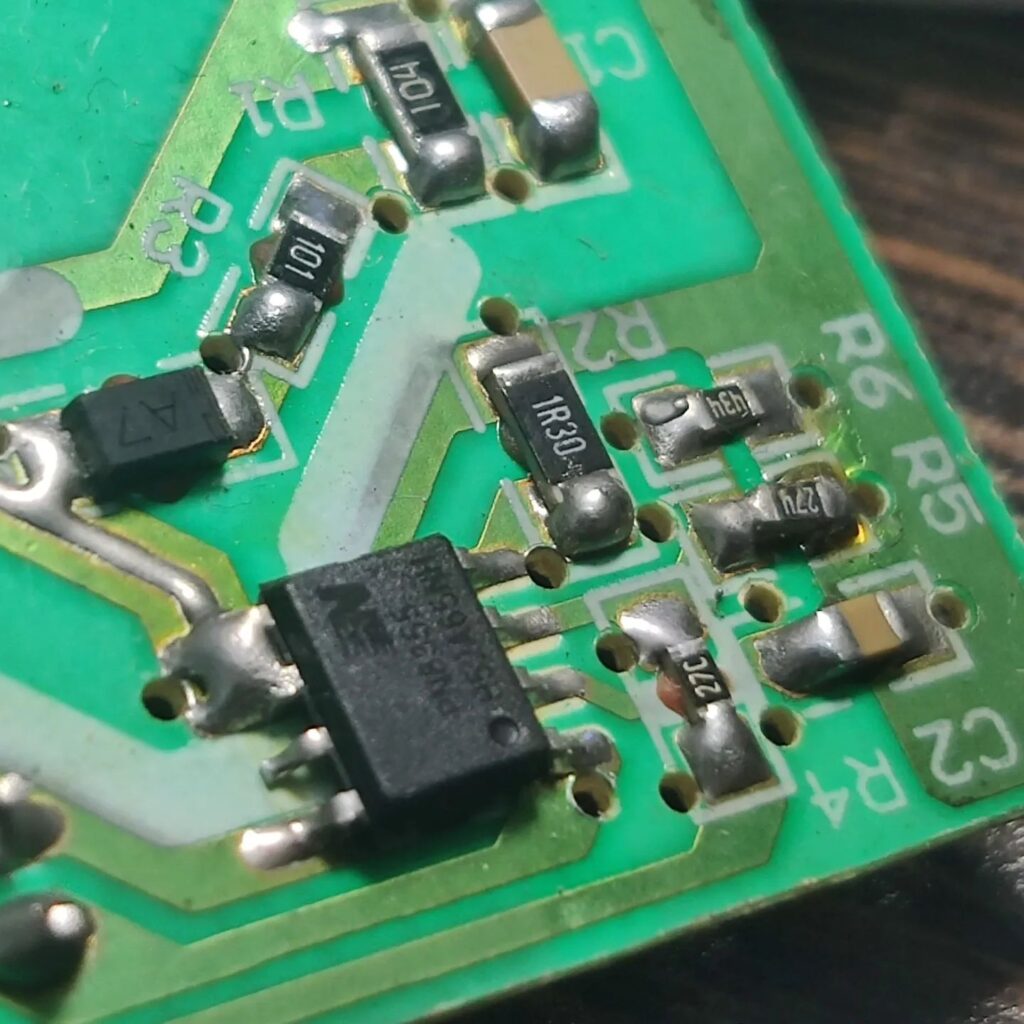
The teardown process was straightforward (Just a few screws in the back). I think the PCB is made with the cheaper fibreglass equivalent of FR4 material and is one-sided. The circuit is fairly decently designed for the price they sell it at. The AC input is fed through a glass fuse and run through MB10F IC from Diodes Inc, which is a single chip full bridge rectifier to convert 220V AC to DC. This high voltage DC is fed to PN8335 IC which is a buck converter with active power factor correction. It has a tiny transformer providing some isolation to the DC side and provides the feedback to keep output at 5V. The high voltage DC is switched at high frequencies to generate the 5V after rectification at the output. This is similar to the circuits you would find in cheaper DC power adapters. To be honest, they have given a slot cut out for high voltage AC and DC sections so that’s nice.

If you liked the post, Share it with your friends!

Boat Rocker Headphone Teardown and Fault Diagnosis

Boat Headphone Teardown

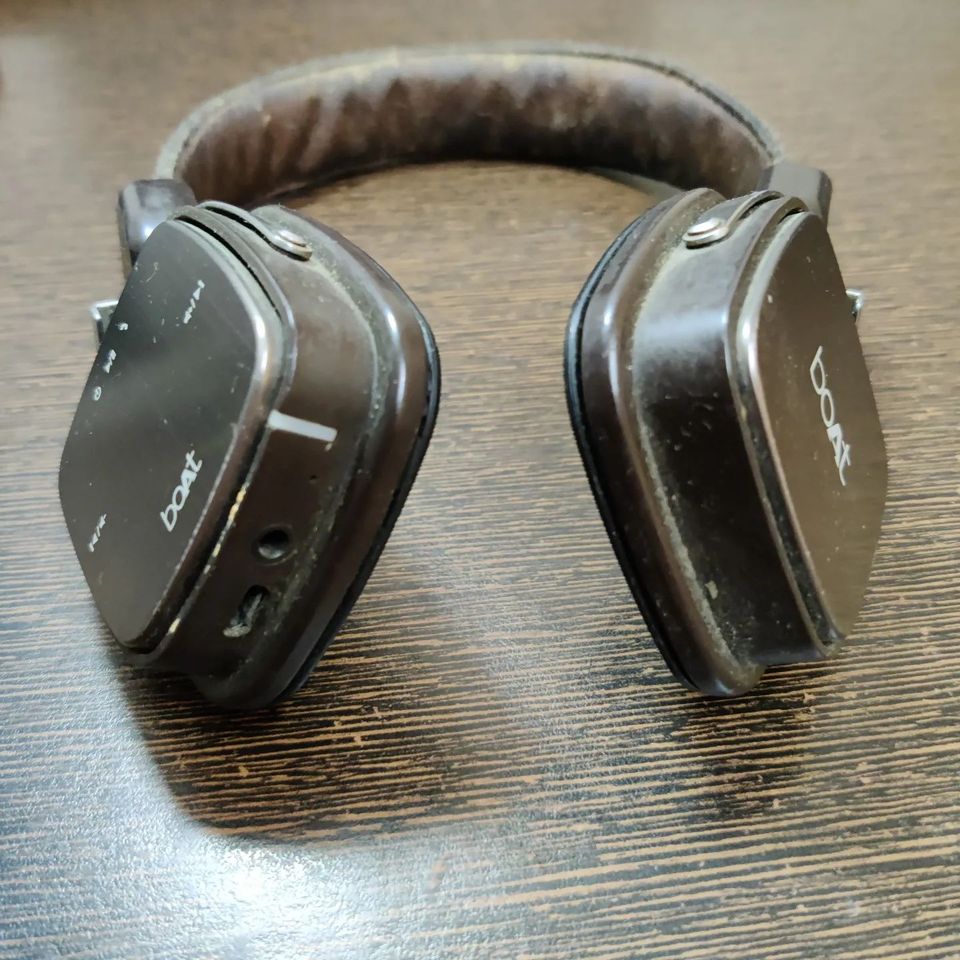
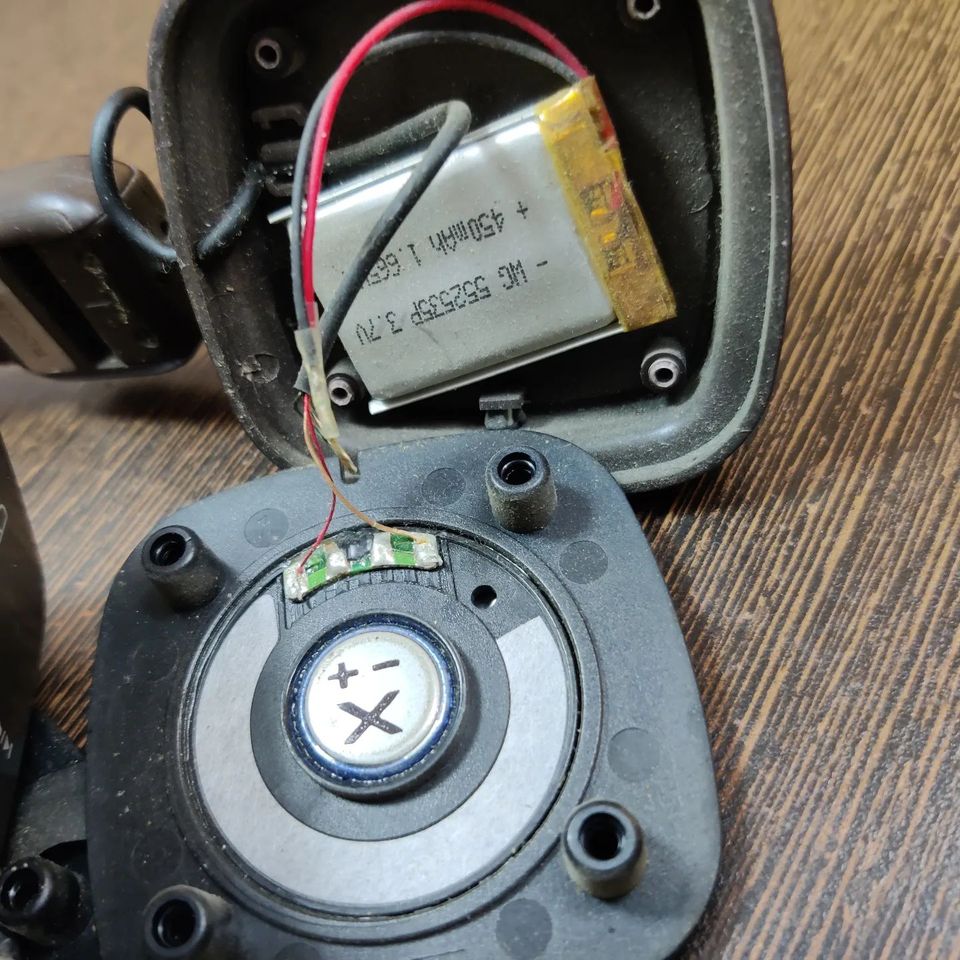
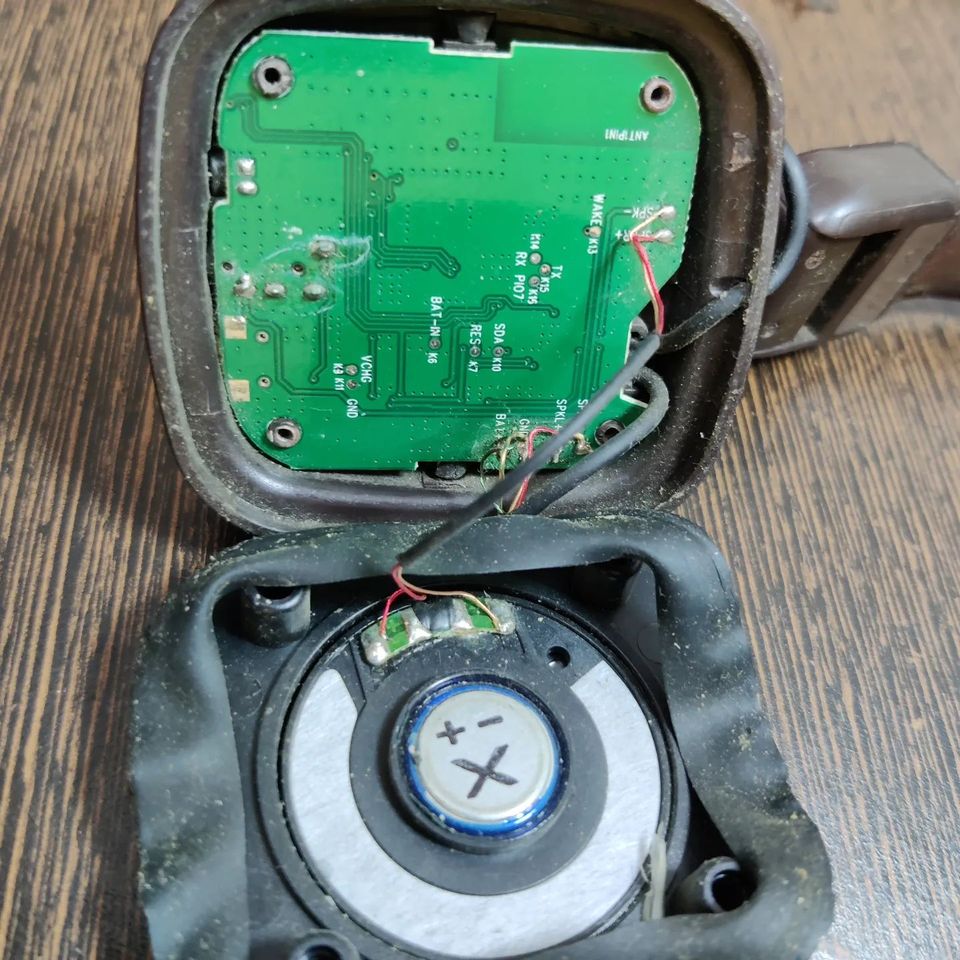
A friend of mine dropped off a pretty old pair of wireless Bluetooth Boat Rocker headphones which were not working. The power LED turns ON but it’s unresponsive after that. Opened it up and first did a charge test with a USB current meter and found that there was no current taken from the power supply. That’s usually bad news, as that could potentially mean that the battery is bust or the main chip is blown. I opened up the battery compartment and there was no bulging of the battery. The battery was showing voltage, which was slightly low, but nothing too concerning. Then I desoldered the battery and connected a spare battery right on the PCB. Then plugged in the USB meter and voila the new battery is charging. Turned out the culprit was a faulty positive battery wire running all along the headband. It had no continuity and it was broken in between. Replacing that thin wire should get the headphones backup. The device wasn’t turning ON as the main chip couldn’t detect the battery due to the broken wire, even though it was getting external power.

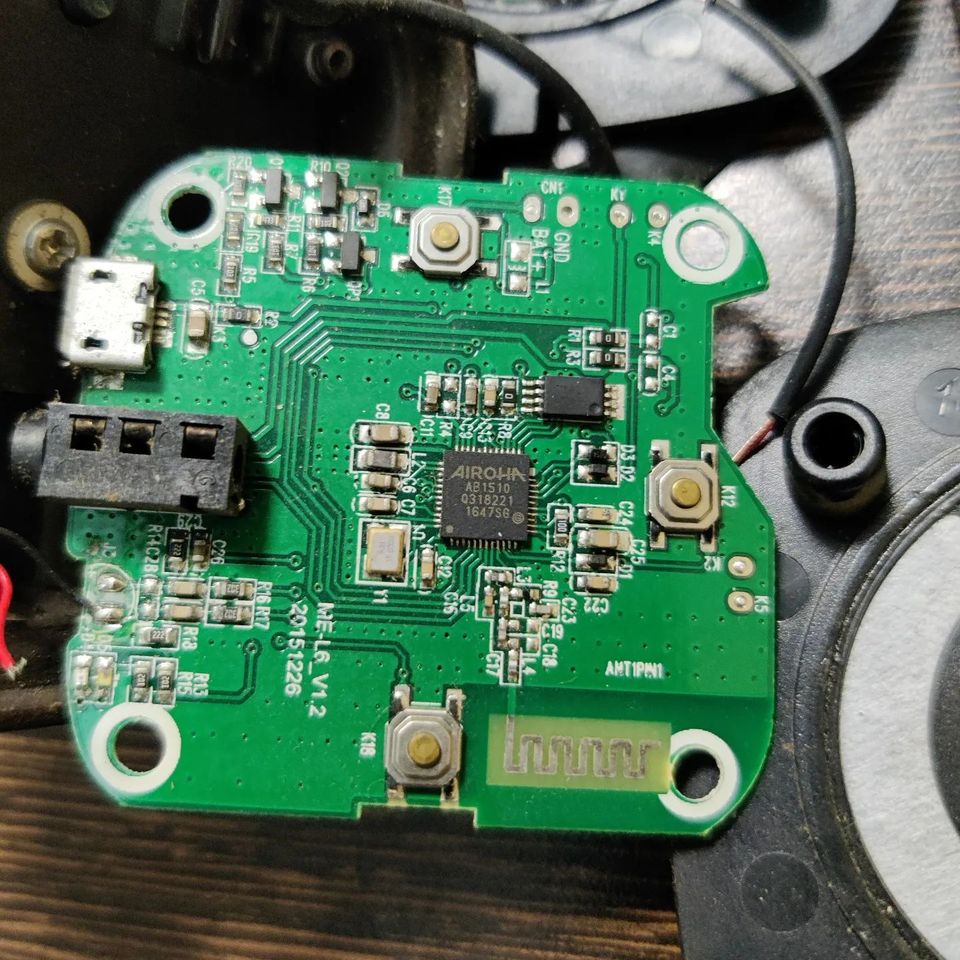
Coming to the circuit analysis, these BLE headphones contain a Bluetooth chip from the Taiwanese manufacturer Airoha (AB1510). It’s a DSP chip with 48MIPS. It has all the bells and whistles for audio input, processing and outputs. It has a BLE PCB antenna. The great part of this chip is a built-in battery charge controller capable of charging at 400mA with protection. This eliminates the need for an external charging circuitry altogether. I couldn’t find a pricing for these chips though. If anyone knows please do comment. The other main IC is 24C128A, which is a 2-wire Serial EEPROM from Microchip to mostly store audio presets I suppose. The LiPo battery has a capacity of 450mAh. All in all, a reasonably well-designed headphone.

If you liked the post, Share it with your friends!
1 6 7 8 9 10 17