I came across an unusual paper this week on a way to detect radio waves and to pull out speech data from normal walkie-talkie signals. It’s interesting, and I never knew this domain of detection. Let’s discuss.
A Rydberg atom is an atom with one electron pushed far from the nucleus into a very high energy state. Think of it as a weak, oversized atom. The distant electron makes the atom extremely sensitive to external electric fields.
So when a radio wave passes through, its electric field slightly shifts the atom’s energy levels. That shift is called the AC Stark shift. In simple terms, the RF field nudges the atom enough to change how it interacts with laser light. If you watch that laser with a photodetector, you can tell a radio signal is present.
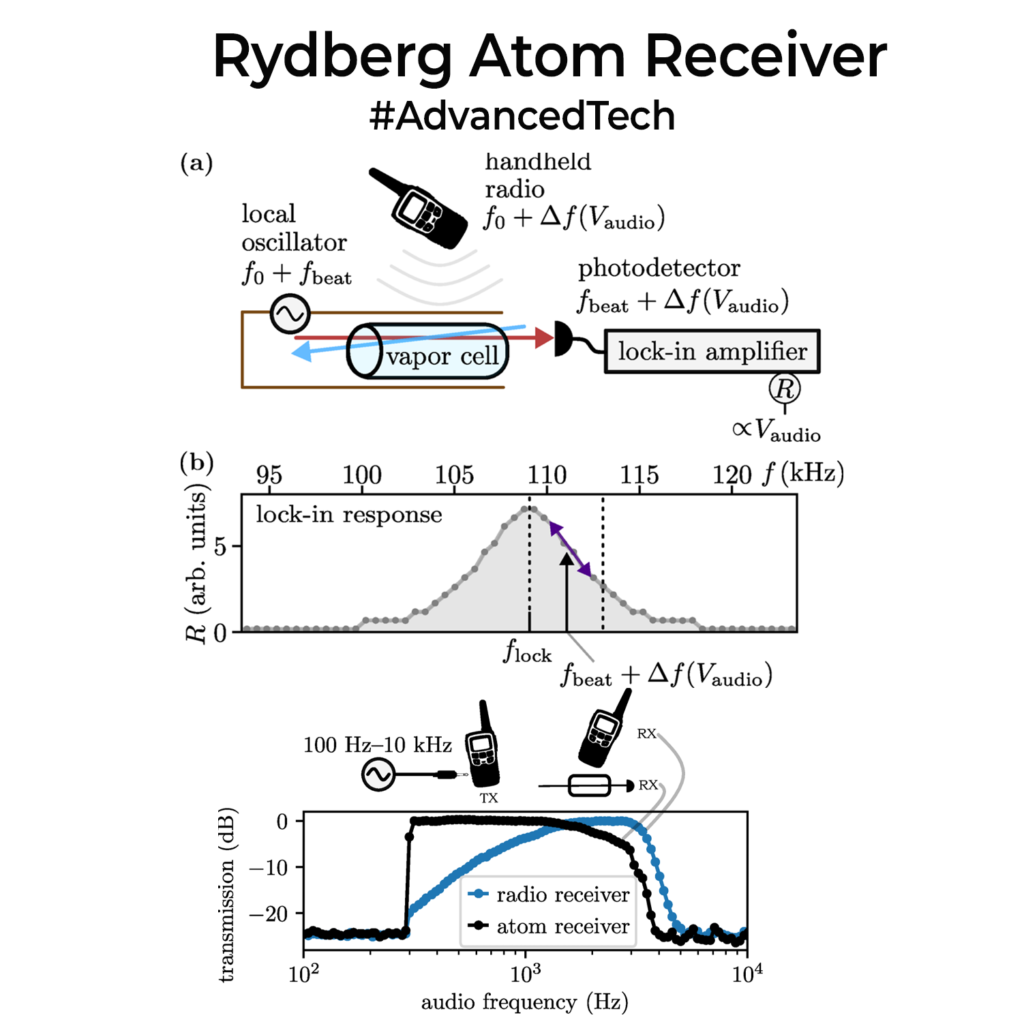
In this paper, the team put rubidium (Atomic number 37) atoms in a vapour cell, shine lasers through it to create and probe the Rydberg state, and let a UHF(~460MHz) walkie-talkie transmit nearby. The incoming RF field changes the atoms, the optical signal changes with it, and that change is converted back into audio.
Since FM doesn’t directly show up in amplitude, they mix the signal with a nearby local oscillator and use a lock-in amplifier to extract the tiny beat signal. That’s how the audio is recovered cleanly.
So why does this matter? A normal radio uses an antenna, tuned RF circuits, mixers, and some DSP ICs. This approach uses atoms as the field-sensitive element instead. In this paper, they recovered real FM speech from a handheld radio and separated adjacent channels well. That’s a pretty nice trick to pull off.
It still does not beat a cheap radio chip on size, cost, power, or practicality. But I think the point is different. This work asks whether nature itself can be the sensor, and whether you can build a receiver around physics first and electronics later.
Anyway, if you are interested in these type of stuff give the paper a quick read at doi.org/10.1103/jlrg-6889